J160 Shifter Relocation Guide
Disassembly – part 1 – shifter housing and gearstick assembly
– Lift the rubber boot up that’s located in the middle of the gearstick to expose the retainer plate and it’s x4 bolts.
– Undo and remove the x4 bolts holding the gearstick in place. These are located just above the pivot of the gearstick and go through a steel retainer plate and into the shifter housing.
– Pull the gearstick out of the shifter housing. NOTE: take caution to not loose any of the shims, one of them will be left in the cavity that was originally under the bushing. Set aside the gearstick along with the bushes and shims.
– Undo and remove the x4 bolts that hold the main shifter housing assembly on to the gearbox housing.
– Pull the shifter housing up and remove.
Disassembly – part 2 – gear shaft and rear extension
– The rear shifter extension is the cast iron part that slides over the gear shifter shaft at the top rear of the gearbox. Undo and remove the single bolt holding this down and set it aside.
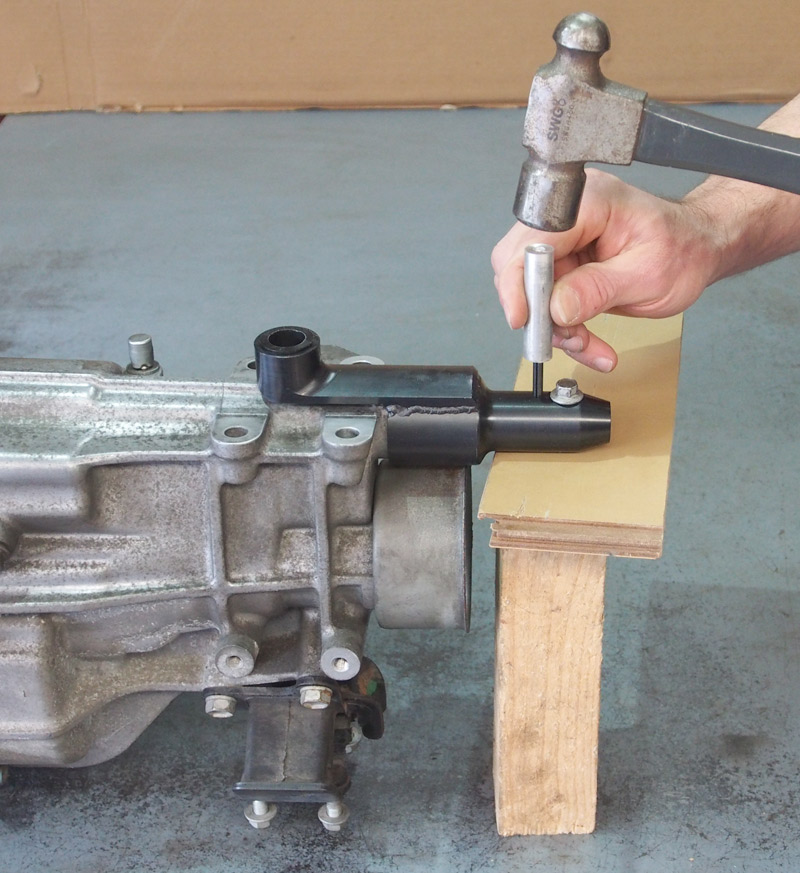
– Knock the locating pin out of the rear extension and set aside. WARNING: It is advised that shift mechanism shaft is physically supported when the pin is knocked out to avoid force being put on it and the gearbox housing / internals. A very quick and simple way of doing this is via a short piece of wood between the bottom of the shaft and the ground. See further down this page for an example picture.
– With the pin and bolt removed slide the original rear extension shifter off.

Original shifter parts removed from the gearbox.
Reassembly – part 1 – gear shaft and rear extension
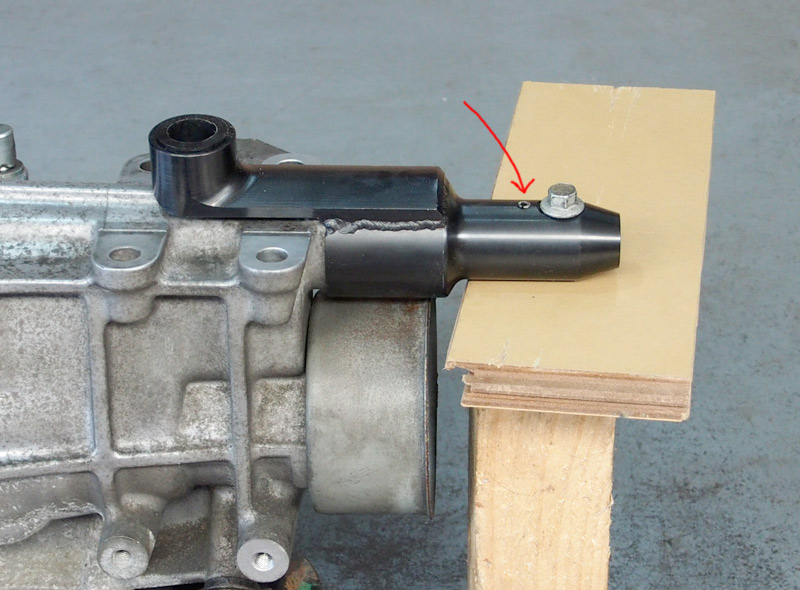
– Using the supplied replacement rear extension slide it over the shifter shaft.
– Using the reverse process re-fit the retainer bolt and knock the locating pin back through the side of the rear extension into the shifter shaft [See below]. WARNING: It is advised that shift mechanism shaft is physically supported when the pin is knocked out to avoid force being put on it and the gearbox housing / internals. As per this picture below using one or more pieces of wood is a very quick and simple way method of doing so.
Reassembly – part 2 – shifter housing and gearstick assembly
– Using the x4 supplied bolts fit and tighten the new shifter housing to the top of the gearbox [See below].
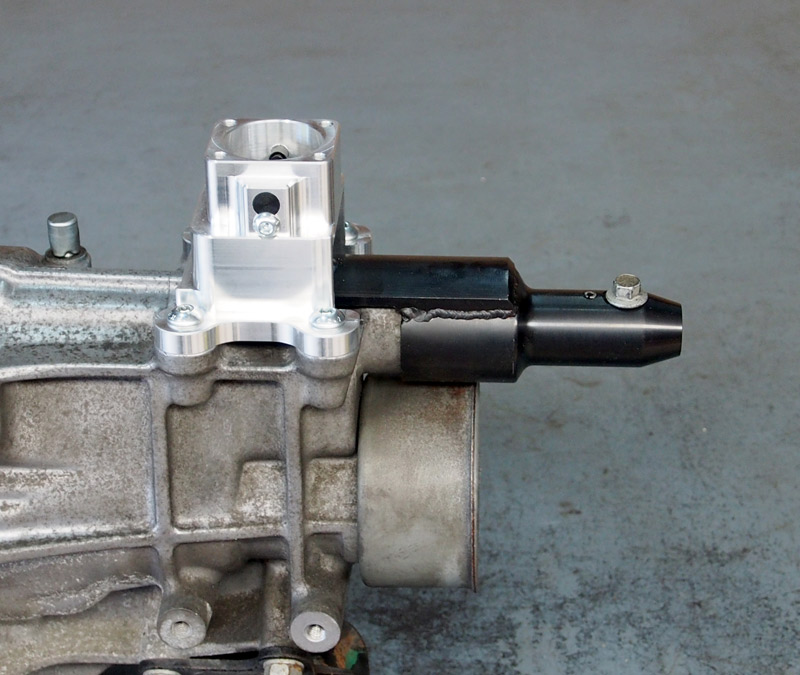
– Using the original shims slide the gearstick and it’s bushing into the new shifter assembly housing [See below]. The rear extension will need to be manually turned a little to align with the gearstick end during the install. NOTE: The top shim needs to be correctly aligned such that the small tabs on either end slot into the top of the bushing.

– Fit and tighten the x4 bolts for the gearstick retainer plate into the shifter housing.
– Slide the gearsticks middle rubber boot back over the retainer plate.
Here is a featured installation video courtesy of Speed Academy.