Throttle Linkage Install Guide – Downpull
This down-pull kit alters the throttle cable position on 4age 20V throttles to the bottom side facing up when the throttles are fitted upright. This is where the Throttle position sensor (TPS) is facing toward the front of the engine.
Throttle cable length notes
Due to being able to be routed around or under the brake master cylinder the throttle cable used can vary a great deal in it’s length. Other than the options given bellow a cable can potentially be custom made.
Throttle cable compatibility – Right hand drive
When fitted to AE71, AE86 or KE70 model Corolla / Sprinter the long RHD KE70 cable can be used, a second option is the Left hand drive AE86 to 4AGE 16V cable, this is shorter and better fitting but either option should perform the same. A RHD AE86 – 4AGE throttle cable can not be used as it is too short. When using a KE70 cable it’s best run inside the metal brake lines, as in following as closely as possible to the upright metal surface of the strut tower. From here it is curved down and inwards, then with a wide gentle bend curved upwards to the throttle bracket.
Throttle cable compatibility – Left hand drive
In a vehicle such an AE86 the OEM cable that was originally used with the 4age 16V can physically fit into place, however it is a little short and it causes a bend in the sheath just off where it fits up to the throttle bracket. This may cause extra drag, it’s suggested to use a longer cable such as one from a right hand drive KE70
Disassembly / preparation for fitment
– 20V 4age engines: Undo the bolts for the OEM block to throttle brace, this on the top has a 12mm head and is under the throttle body, this may be missing from the engine.
– Remove both the number #2 and #3 throttle bodies from the intake if they are still in place. To do so it’s highly suggested to use an impact screwdriver as these bolts are quite prone to strip. Otherwise use a well fitting screwdriver and push down as hard as possible before turning. With the same process remove the throttle lift off valve and plug the rubber line that fed it. This valve is normally bolted to the bottom of the #3 throttle.
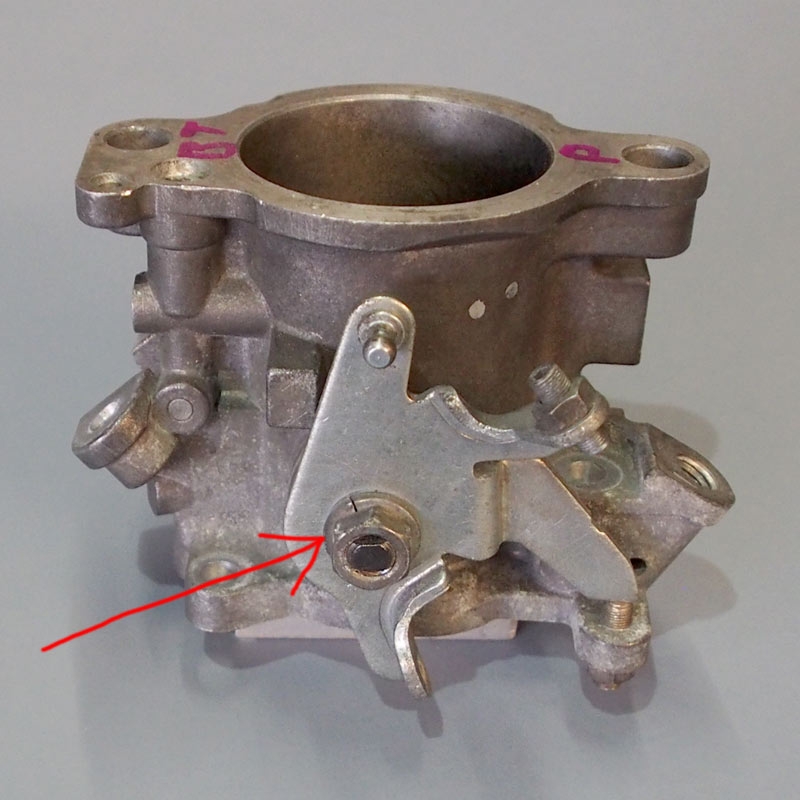
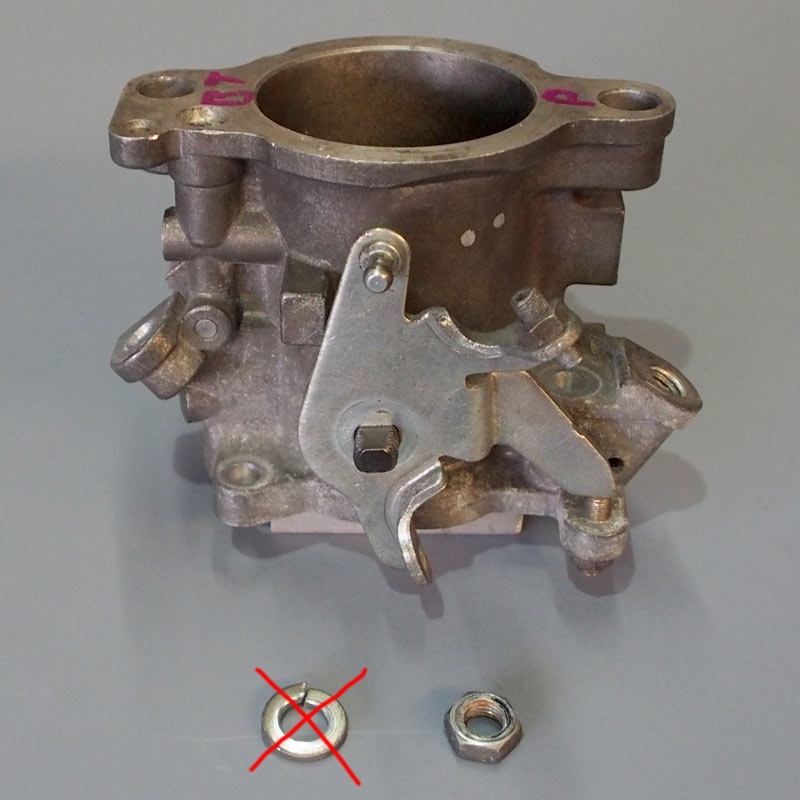
– Using a 12mm spanner undo the throttle shaft nut, remove both it and the spring washer but leave the original linkage in place.
Installation of throttle kit
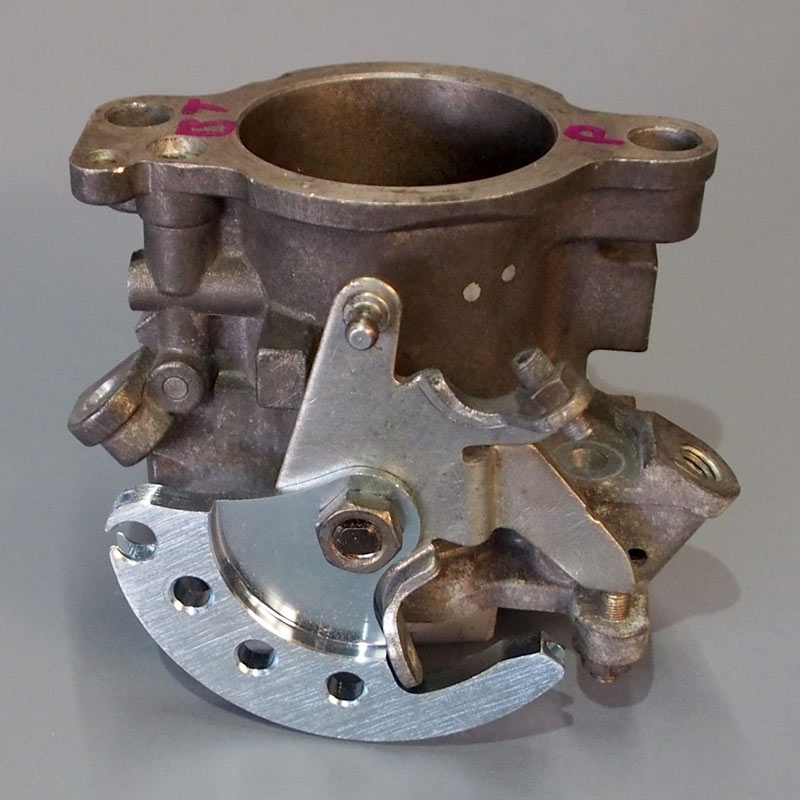
– Place the new SQ-Engineering linkage arm onto the shaft and on top of the original linkage.
– Place the nut back on the shaft and tighten it against the new throttle linkage. Do not re-fit the spring washer as it can’t be used.
– Fit the end of the throttle cable on to the new linkage. Once fitted it will look as pictured below:
– Fit the throttles back onto the intake manifold. Fit the throttle with the custom linkage first and then followed by the one next to it. The original JIS (they look like Philips but aren’t) head bolts shouldn’t be re-used as they are too prone to strip and difficult to tension to a predictable torque setting.
– Using the supplied bolts fasten the bracket to the throttle bodies, use the thin stainless washers under each bolt head to do so. If the block to throttle brace is still to be used then see the next section.
– Fit the throttle cable into place by fully opening the throttles and then fitting the throttle cable end into the new linkage.
Original 4AGE 20V engine block to throttle brace use
This kit is compatible with the 20V OEM support straps that from new are fitted between the engine block and the bottom of the throttles. The new SQ-Eng throttle bracket is fitted such that one side of it sits directly over the top end of the existing support strap. Therefore one of the supplied bolts goes through the new bracket, the end of the existing strap under it and then is clamped to to the bottom of the #2 throttle body. The other side of the SQ-Eng bracket (under throttle #3) has to be spaced outwards to match the offset caused but the OEM strap thickness. Two thick gold coloured washers are provided with each kit, use both of these together between the new bracket and the #3 throttle.
Throttle calibration
If the throttles are being installed in a new application at the same time as this linkage kit then it’s highly suggested to calibrate the throttles. Doing so will ensure that they are synchronised to each other and hence all open at the same time. This is covered in the 20V 4AGE workshop manual linked below. This is under “Fuel injection” at page 50 on.
Note: This full calibration is also required if any of the throttles are unbolted from a the manifold thatdoes not have locating dowels fitted. In this case if any of the four throttles are removed or moved then all four throttles should be recalibrated. All of the SQ-engineering manifolds come pre-fitted with these dowels.